How To Buy and Set Up Starlink at Home Step By Step
Imagine this: You live in a beautiful, remote area, far from the hustle and bustle of city life. The only thing missing? Reliable, high-speed internet. Rural, underserved communities and regions have been stuck with painfully slow DSL, unreliable traditional satellite connections, and no internet options for too long.
Poor internet has made it hard for many people to access education, work from home, watch online content, or use essential services.
This guide will help you through every step of the journey, from understanding what Starlink is and how it works to ordering your kit, finding the perfect spot for your dish, and finally, enjoying blazing-fast internet in your home.
Enter Starlink:
Starlink, a revolutionary satellite internet constellation developed by SpaceX, is rapidly transforming the landscape of global connectivity. By deploying thousands of small, low-Earth orbit (LEO) satellites, Starlink offers a compelling alternative to traditional internet service providers, especially for those areas where terrestrial broadband infrastructure is lacking or non-existent. It promises speed and significantly lower latency than older geostationary satellite systems, making online gaming, video conferencing, and seamless streaming a reality for millions previously left behind.
Understanding Starlink: What You Need to Know Before You Buy
Before you click that “order” button, you must grasp the fundamentals of Starlink’s operation and what to expect. This isn’t your grandfather’s satellite internet; it’s an entirely different beast.
How Starlink Works (Simplified): A Ballet in Space

Unlike traditional geostationary satellites that orbit at a fixed point roughly 36,000 kilometres above the Earth, Starlink satellites are much closer, orbiting at an altitude of approximately 550 kilometres. This proximity is the key to Starlink’s low latency and high speeds.
You can read a simplified breakdown:
- Low Earth Orbit (LEO) Satellites: Thousands of these small, agile satellites constantly whiz around the Earth. Each satellite can communicate with multiple user terminals (your Starlink dish) and ground stations.
- Ground Stations (Gateways): These are large, dish-like antennas strategically placed worldwide. They act as the bridge, connecting the Starlink satellites to the terrestrial internet backbone. When you send data, it travels from your dish to a Starlink satellite, down to a ground station, and finally onto the internet. The reverse happens when you receive data.
- User Terminals (Dishy McFlatface): This is the familiar rectangular dish you’ll receive. It’s an advanced phased-array antenna that automatically aligns itself to track the moving Starlink satellites overhead, ensuring a continuous connection. Many users affectionately nickname it “Dishy McFlatface”.
Service Availability: The Cell-Based System
Starlink’s service is based on “cells” – designated geographic areas. Availability depends on the number of active satellites overhead and the capacity of the ground stations in that region.
- Your Registered Service Address is Key: When you order Starlink, your service address determines which cell you’ll be assigned to. This is crucial; if you move outside your registered cell, your service may be degraded or unavailable, especially with the standard residential plan.
- Current Coverage and Expansion: Starlink is constantly expanding its coverage. While it has established a significant presence in many parts of North America, Europe, Australia, and other regions, it’s still in a continuous rollout phase. What was once a beta service has matured significantly, but availability can still vary. Always check the official Starlink website for the most up-to-date coverage map.
- Checking Availability for Your Location: Before anything else, go to Starlink.com and enter your specific service address. The website will tell you immediately if service is available, if you’re on a waitlist (with an estimated fulfillment date), or if it’s unavailable in your area.
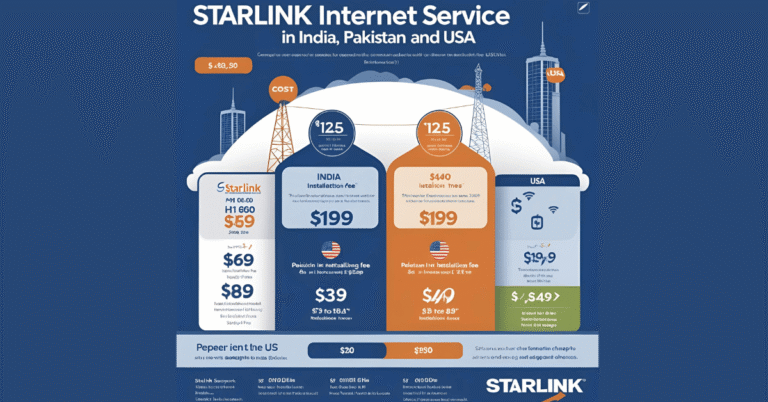
Starlink Plans and Pricing: Choosing What’s Right for You
Starlink offers several service plans designed for different user needs:
- Residential: This is the standard, most common plan for fixed locations like homes. It offers prioritised service at your registered address.
- Roam (formerly RV) is ideal for those who travel frequently or need internet in multiple temporary locations. It offers portability but with a deprioritised service compared to residential users during periods of network congestion. This means residential users will get priority bandwidth if they’re in a busy area.
- Business/Priority: Geared towards businesses and high-demand users, offering higher speeds, lower latency, and dedicated priority on the network. Comes with a higher price point and often a larger dish.
- Maritime/Mobility: For use on boats or other moving vehicles, with specialised hardware and higher service costs.
Pricing: Expect a significant upfront hardware cost for the Starlink Kit (Dishy, router, cables, base) and a monthly subscription fee. These prices can vary by region and plan, so always check the official Starlink website for the latest pricing in your local currency. Be aware of any potential activation fees or shipping costs.
Speed and Performance Expectations: What’s the Reality?
Starlink promises and generally delivers impressive speeds for satellite internet:
- Typical Speeds:
Residential users can expect download speeds ranging from 50 Mbps to 250 Mbps and upload speeds from 5 Mbps to 20 Mbps. These fluctuate based on network congestion, time of day, and environmental factors.
- Latency:
This is where Starlink truly shines compared to traditional satellite internet. Due to the LEO satellites’ proximity, latency typically ranges from 20ms to 40ms, making it comparable to good DSL or cable internet connections. This low latency is crucial for real-time applications like video calls, online gaming, and VPN usage.
- Factors Affecting Performance:
- Obstructions: Any physical blockage (trees, buildings) between Dishy and the satellites will severely impact performance.
- Network Congestion: Speed may temporarily decrease during peak hours or in densely populated cells.
- Weather: Heavy rain, snow, or thick clouds can cause minor signal degradation, though Dishy has a built-in heater to melt snow.
Pros and Cons of Starlink: A Balanced View
Like any technology, Starlink has its strengths and weaknesses:
- Pros:
- High Speed & Low Latency: Game-changer for rural areas.
- Global Potential: Expanding reach to remote locations worldwide.
- Relatively Easy Setup: Designed for DIY installation.
- Portability (with Roam plan): Take your internet with you.
- Continuously Improving: SpaceX is constantly launching more satellites and enhancing the network.
- Cons:
- Initial Cost: The hardware kit is a significant upfront investment.
- Potential for Obstructions: Requires a clear sky view, which isn’t always easy.
- Line of Sight Requirements: No clear view, no internet.
- Evolving Service: Still relatively new, with ongoing changes and occasional outages.
- Customer Support: Primarily app/ticket-based, sometimes slower than traditional ISPs.
- Power Consumption: Dishy consumes more power than a modem/router combo.
Step 1: Checking Availability and Ordering Your Starlink Kit
This is where your Starlink journey officially begins!
- The Starlink Website is Your Gateway:
Navigate directly to the official Starlink website: Starlink.com. Don’t trust the third-party resellers or unofficial sites.
- Entering Your Service Address: You’ll find a field on the homepage where you can enter your service address. This is the exact location where you intend to use Starlink. Accuracy is paramount. A slight discrepancy can place you in a different cell, impacting availability.
- Checking for Availability:
- Immediate Availability: If the service is available in your cell, you’ll be prompted to place your order directly.
- Waitlist/Pre-order Process: If your cell is at capacity, you’ll likely be placed on a waitlist. This typically requires a refundable deposit (check current terms). You’ll receive an estimated fulfilment date, but these can be subject to change. It’s common for people to wait months, or even over a year, depending on their location.
- Not Yet Available: Starlink may not be an option in some remote or unserved areas. However, you can often sign up for email notifications when available.
- Selecting Your Plan: Once availability is confirmed, you’ll choose your desired plan (Residential is the default for most home users). Carefully review the differences between Residential and Roam if you anticipate needing portability.
- Placing Your Order:
- You’ll be guided through creating a Starlink account and providing your shipping and billing information.
- Complete the payment for the hardware kit and any applicable shipping/taxes.
- Once your kit ships, you’ll receive a confirmation email with your order number and tracking information. Delivery times can vary, but typically range from a few days to a few weeks.
- What’s Included in the Starlink Kit: Your Starlink box will contain everything you need for basic setup:
- Starlink Antenna (Dishy McFlatface): The rectangular dish.
- Starlink Wi-Fi Router: Often a white, vertical unit.
- Power Supply: Powers both Dishy and the router.
- Starlink Cable: A proprietary cable connecting Dishy to the power supply/router.
- Basic Base: A simple cross-shaped base for ground-level placement.
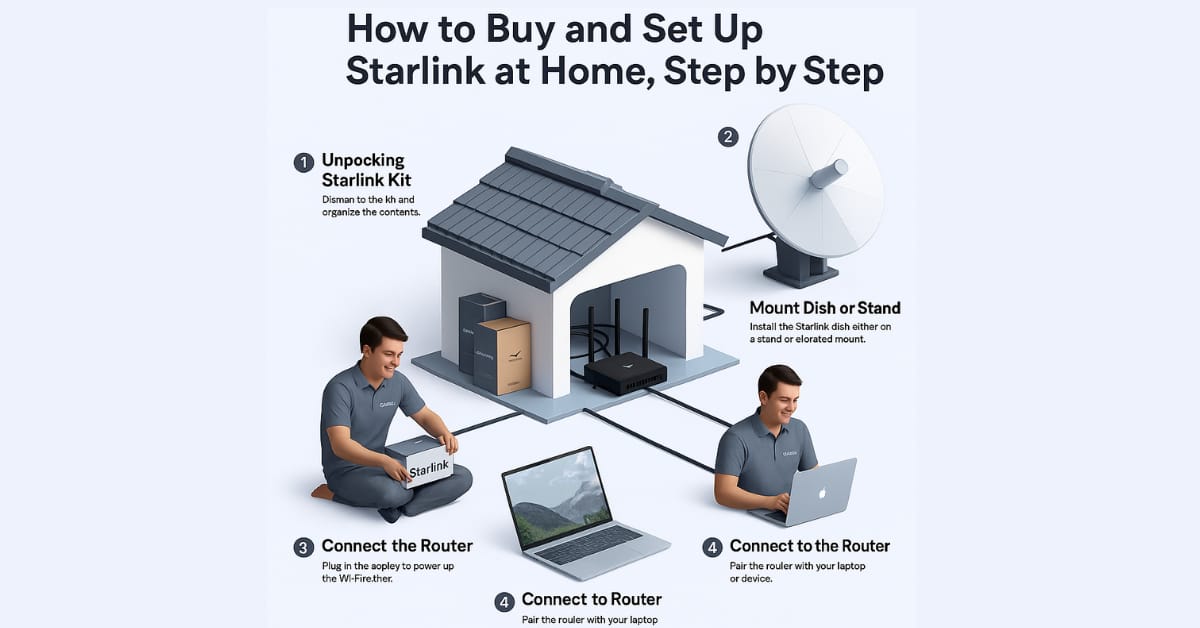
Step 2: Unboxing and Familiarising Yourself with the Kit
The arrival of your Starlink kit is an exciting moment! Take your time to unpack everything and get to know the components.
- Anticipation and Arrival: The box is surprisingly robust. Open it carefully.
- Inventory Check: Lay out all the components and cross-reference them with the packing list. Ensure you have:
- The Starlink Dishy
- The Starlink Router
- The power cable for the router
- The long, black Starlink cable (permanently attached to Dishy on newer versions, or with a distinct grey connector on older ones)
- The basic mounting base
- Key Components Explained:
- Dishy (Starlink Antenna): This is the magic box. It’s heavier than it looks and has a motor inside that automatically points itself towards the satellites. The cable typically extends from the base of the mast.
- Starlink Router: This unit creates your Wi-Fi network. On newer models, it connects directly to Dishy’s cable. It’s usually a sleek, minimalist design.
- Power Supply: A separate power brick connects Dishy’s cable to the router on some older kits. On newer kits, the power supply is integrated into the router.
- Starlink Cable: This is a thick, durable, weather-resistant cable. Be careful not to kink or damage it. The connection to Dishy is proprietary and very robust.
- Basic Base: This is a simple, non-permanent mount. It’s suitable for initial testing but not for long-term, stable installations.
- The Starlink App: Crucial Step! Before you consider putting Dishy outside, download the official “Starlink” app on your smartphone or tablet (available on iOS and Android). This app is indispensable for setup, monitoring, and troubleshooting. It includes an “Obstruction” tool vital for finding the perfect placement for Dishy.
Step 3: Finding the Ideal Location for Your Starlink Dish
This is the most critical step for optimal Starlink performance. The wrong location can lead to constant service interruptions and frustration.
- Crucial Step: Starlink requires an entirely unobstructed view of the sky. Because the satellites are constantly moving, Dishy needs to see a wide swath of the sky, not just a single point.
- The “Clear Line of Sight” Requirement:
- Why it’s important: If something blocks Dishy’s view, like trees, buildings, or power lines, you will face “obstructions”. This can cause brief but frequent internet drops. These drops can be maddening during video calls or online gaming.
- Understanding Obstructions: Dishy needs to see a large, clear sky cone. Any object within that cone will cause an issue.
- The “Dishy View” in the Starlink App is your best friend. Take your phone to potential mounting locations and use the app’s obstruction checker. It uses your phone’s camera and GPS to show where Dishy looks and highlight real-time obstructions. Move around, test different spots, and identify the clearest area.
- Factors to Consider for Placement:
- Clearance from Obstructions: This is the absolute priority. Go higher if necessary.
- Stay Close to the Power Outlet: Even though the Starlink cable is extended, keep the router plugged in nearby.
- Cable Length: The standard Starlink cable is typically 75 feet (about 23 meters). Starlink offers longer cables (150 feet/46 metres) as an accessory if you need more. You may also consider an outdoor power solution.
- Accessibility for Maintenance: Starlink requires minimal upkeep. However, you should clear snow or debris from time to time. Dishy has a heater for snow.
- Security: Think about the physical safety of your Dishy, especially if you put it on the ground.
- Aesthetics (Optional): Some users hide Dishy for looks, but it’s more important to see it.
- Common Mounting Options: Starlink provides several official mounts. You can also find third-party solutions.
- This base works well for testing on a patio or ground. However, it’s not ideal for permanent installations, as wind and obstructions can cause issues.
- Roof Mounts:
- Pipe Adapter: If you have an existing antenna or satellite dish pole, you can mount Dishy.
- Ridge Cap Mount: Attaches right at the peak of your roof for excellent clearance.
- Wall Mount: This is for attaching to a building’s side. It usually needs enough height to avoid obstacles.
- Flashing Mount: This mount securely attaches to the roof like a standard satellite dish mount and requires careful sealing.
- Pole Mounts: A standalone pole is often cemented into the ground. It offers great height, especially in areas with many trees.
- Non-Penetrating Mounts: These sturdy bases rest on flat roofs and use concrete blocks for support. They are suitable for situations where roof penetration is not desired.
- Safety First:
- Working on Roofs: Safety is paramount if you choose a roof mount. Use a stable ladder, wear appropriate footwear, and consider a safety harness. If you’re uncomfortable, hire a professional.
- Stay Clear of Power Lines: Always watch for overhead power lines when setting up ladders or poles.
- Professional Installation: If your setup is tricky or DIY feels tough, hire a local expert. Look for someone skilled in antenna or satellite dish setup.
- Planning Your Cable Run: After choosing the best spot for Dishy, consider how the cable will enter your home.
- Through walls: This requires drilling a hole and proper sealing with weatherproof caulk.
- Through a Window Frame: Can be done with a flat cable pass-through, but may affect window sealing.
- Seal through a vent if feasible.
- Protect the Cable: Don’t let windows or doors pinch the cable. Use cable clips to secure it on your house’s exterior. This will help prevent snagging and wind damage. If possible, protect it from direct sunlight and pests.
Step 4: Mounting Your Starlink Dish
Now that you’ve chosen your ideal spot and mounting option, it’s time to install it.
- Read Instructions: Refer to the specific instructions provided with your chosen Starlink mount. Each mount type has unique installation steps.
- Step-by-Step Mounting Process (General):
- For the included basic base, unfold the legs and place Dishy on a flat, stable surface. This works for initial tests, but it’s not a permanent fix. It’s unstable and may have obstructions.
- For Roof/Pole Mounts (More Detail):
- Assemble the Mount: Follow the mount’s instructions to put it together.
- Secure the Mount:
- Roof Mounts: Use the right lag screws or bolts to attach the mount to the roof trusses or supports firmly. Use plenty of weatherproof caulk around all screw holes and under the mount base to help stop water leaks.
- Pole Mounts: First, dig a deep and wide hole to cement a pole. Next, check that the pole is straight using a level. Finally, fill the hole with concrete. Allow ample time for the concrete to cure.
- Ensure Stability: Once secured, shake the mount gently to ensure it’s rock-solid. Wind can exert significant force on Dishy.
- Insert Dishy: Carefully slide the mast of Dishy into the mounting pipe. It’s designed to click securely into place, ensuring a stable connection. Double-check that it’s fully seated. Dishy will self-orient later, so no need to manually aim it.
- Connecting the Cable:
- Route the Cable: Carefully route the Starlink cable from Dishy’s mast along your chosen path to the interior of your home.
- Protect the Cable: Ensure the cable is not kinked, pinched, or stretched. For outdoor use, use UV-resistant cable clips. They will keep the cable neat along exterior walls, preventing it from dangling or being damaged by the wind.
- Interior Entry: If drilling a hole, drill from the inside out to avoid hitting internal structures. Use a drill bit slightly larger than the cable connector. Seal the hole well after running the cable through with weatherproof caulk on both sides. This will stop drafts, moisture, and pests.
Step 5: Connecting and Powering On Your Starlink System

The dish is mounted, the cable is run – now for the indoor connections.
- Indoor Setup:
- Router Placement: Place the Starlink Router in a central location within your home for optimal Wi-Fi coverage. Avoid placing it in e;;;54p?#Tcabinets or other electronics that might cause interference. Ensure it has good ventilation.
- Connecting the Cables:
- Dishy to Router: Connect the long black cable from Dishy to the correct port on the Starlink Router. On newer models, this is a single, direct connection. In older versions, the Dishy cable connects to a power supply brick, which then connects to the router. Pay close attention to the specific port; it’s usually distinct from the power port.
- Power Up: Plug the router’s power cable into a standard wall outlet.
- Powering Up:
- Indicator Lights: Observe the indicator light(s) on the Starlink Router. They usually blink at first, then turn solid white or green when the internet connects.
- Dishy’s Dance: Once powered, Dishy will begin its self-orientation process. It will move, tilt, and rotate as it searches for and locks onto the Starlink satellites overhead. This “Dishy dance” is typical and can take several minutes. You might hear faint motor noises.
- Initial Boot-Up and Firmware Updates:
- Starlink systems automatically download and install the latest firmware updates when they start. This is crucial for performance and security.
- During this process, your Dishy might temporarily lose connection, and the router light might change. Be patient. Do not unplug the system during this time. From getting the satellite to updating the firmware, the process can take 10 to 30 minutes. Sometimes, it may take even longer.
Step 6:
Configuring Your Starlink Wi-Fi Network
You can connect your devices once Dishy has found its satellites and the router is powered up.
- Connecting to the Starlink Wi-Fi:
- Open the Wi-Fi settings on your smartphone, tablet, or computer. Then, look for available networks.
- Look for a network called “STARLINK” or something similar, maybe with random characters.
- Initial Connection: The Starlink Wi-Fi network may be open for the first connection. No password is needed. Connect to it.
- Using the Starlink App:
- Launch the Starlink app on your connected device.
- The app will automatically detect your Starlink system.
- Follow the on-screen prompts. The app will guide you through:
- Change your Wi-Fi name (SSID) from “STARLINK” to something personal. For example, use “MyHomeStarlink.”
- Setting a Strong Password: This is vital for network security. Pick a strong password. Use a mix of uppercase and lowercase letters, numbers, and symbols.
- Confirmation: The app will confirm your new Wi-Fi settings. Your device might briefly disconnect while the router updates the settings, but it reconnects automatically.
- Testing Your Connection:
- Speed Test: The Starlink app has a built-in speed test. Run it to get an immediate sense of your download and upload speeds and latency. You can also use reputable third-party speed test websites like Speedtest.net.
- Real-World Usage: Open a web browser, visit a few websites, stream a video, and make a video call. This will give you a practical feel for the quality of connection. Enjoy the speed!
- Advanced Router Settings (if applicable/needed):
- Bypass Mode: You can use your own Wi-Fi router or mesh system. Just enable “Bypass Mode” in the Starlink app on the Starlink router. This makes the Starlink router act like a modem. It sends the internet connection straight to your chosen router. You’ll need the optional Starlink Ethernet Adapter for this.
- Mesh Wi-Fi: Starlink offers mesh Wi-Fi nodes if you need to extend coverage within a large home. These are configured directly through the Starlink app.
- Common Troubleshooting Tips:
- “Offline” Status in App:
- Check all cable connections (Dishy to router, router to power outlet) and ensure they are firmly seated.
- Verify the router has power (indicator light).
- Check the “Obstructions” tab in the app.
- If there’s heavy weather, wait for it to clear.
- Slow Speeds:
- Re-check the “Obstructions” tab. Even minor obstructions can cause dips.
- Run a speed test from within the Starlink app to differentiate between Wi-Fi and satellite issues.
- Try moving closer to the Starlink router to prevent a weak Wi-Fi signal.
- Consider local Wi-Fi interference (from neighbours’ networks, other electronics).
- Intermittent Connection:
- Almost always due to obstructions. Re-evaluate Dishy’s placement.
- Check the physical integrity of the Starlink cable for damage.
- Ensure the router is not overheating.
- Rebooti is the classic IT solution! Unplug the Starlink router from the power for 30 seconds, then plug it back in. This will also reboot Dishy.
- Factory Reset: If router problems keep happening, you can use the app to perform a factory reset as a final option. However, this will erase your Wi-Fi settings, which you must reconfigure.
- “Offline” Status in App:
- Customer Support:
- If you have problems you can’t fix, reach out to Starlink support using the app.
- Give as much detail as you can.
- Add screenshots of error messages.
- Include obstruction maps.
- Provide speed tests.
- Offer a clear problem description.
- Be prepared for response times that might not be instantaneous, as support is primarily ticket-based.
- Accessories:
- Starlink Mounts: Check out Starlink’s online store. You can find different mounting options there, including pole mounts, wall mounts, long wall mounts, and flashing mounts. Choose the best one for your installation.
- Longer Cables: If the included 75ft cable isn’t enough, 150ft cables are available.
- Ethernet Adapter: This accessory links wired devices to the Starlink system. It plugs into the Starlink router and can be used for a desktop PC, gaming console, or Wi-Fi router.
- Mesh Wi-Fi Nodes: Starlink Mesh nodes easily boost Wi-Fi coverage if you have a large home or property.
Conclusion:
You’ve successfully navigated buying and setting up Starlink at home. You’ve opened a new era of connectivity for your home. It starts with the thrill of checking availability. Then, you hear the satisfying click as Dishy finds its satellites.
Starlink is a significant step forward. It helps people who have struggled with poor or no internet options. It boosts remote work, improves online learning, and simplifies streaming. Plus, it connects communities in new ways. Even with its challenges, its transformative impact on internet access is clear.
The Starlink constellation keeps growing, and the service evolves with new features and better performance ahead. If you want fast, reliable internet, choosing Starlink might be a smart move for your home. Welcome to the connected world!